By: Slavomíra Habardová
Making silver clay jewellery is what alchemists have been trying for ages - to turn ordinary materials into gold. Today, we will transform seemingly ordinary clay into fine silver.
Supplies (package can be purchased here):
- 2 approximately identical blackberry or other leaves - we need leaves with a nice structure on the reverse side, now in winter you can easily find blackberry leaves; somewhere in the garden may be some sage,
- Art Clay Silver (ACS) paste or clay or lump clay (can be dry) from previous jewellery projects,
- 2 sterling silver earring hooks (925/1000),
- 2 sterling or fine silver jump rings (925/1000 or 999/1000) with a diameter of 3.2 mm.
Tools:
- firm, smooth foil,
- small flat brush,
- pencil and paper,
- fine file, ideally with a pointy end,
- very fine sandpaper,
- gas torch,
- firing plate - only use products designed for this purpose, you will work with a temperature of approximately 650 - 960 ° C,
- metal tweezers,
- a container of cold water for cooling silver,
- brass brush
- stainless steel burnishing tool or any other stainless steel tool without sharp edges (modelling tool in the shape of a ball, etc.).

The technique of copying real leaves is simple, but time consuming. It is ideal to work on it in addition to other activities that can be interrupted from time to time.
Prepare your desktop. A solid smooth foil, which is used for binding documents, proved to be ideal for me.
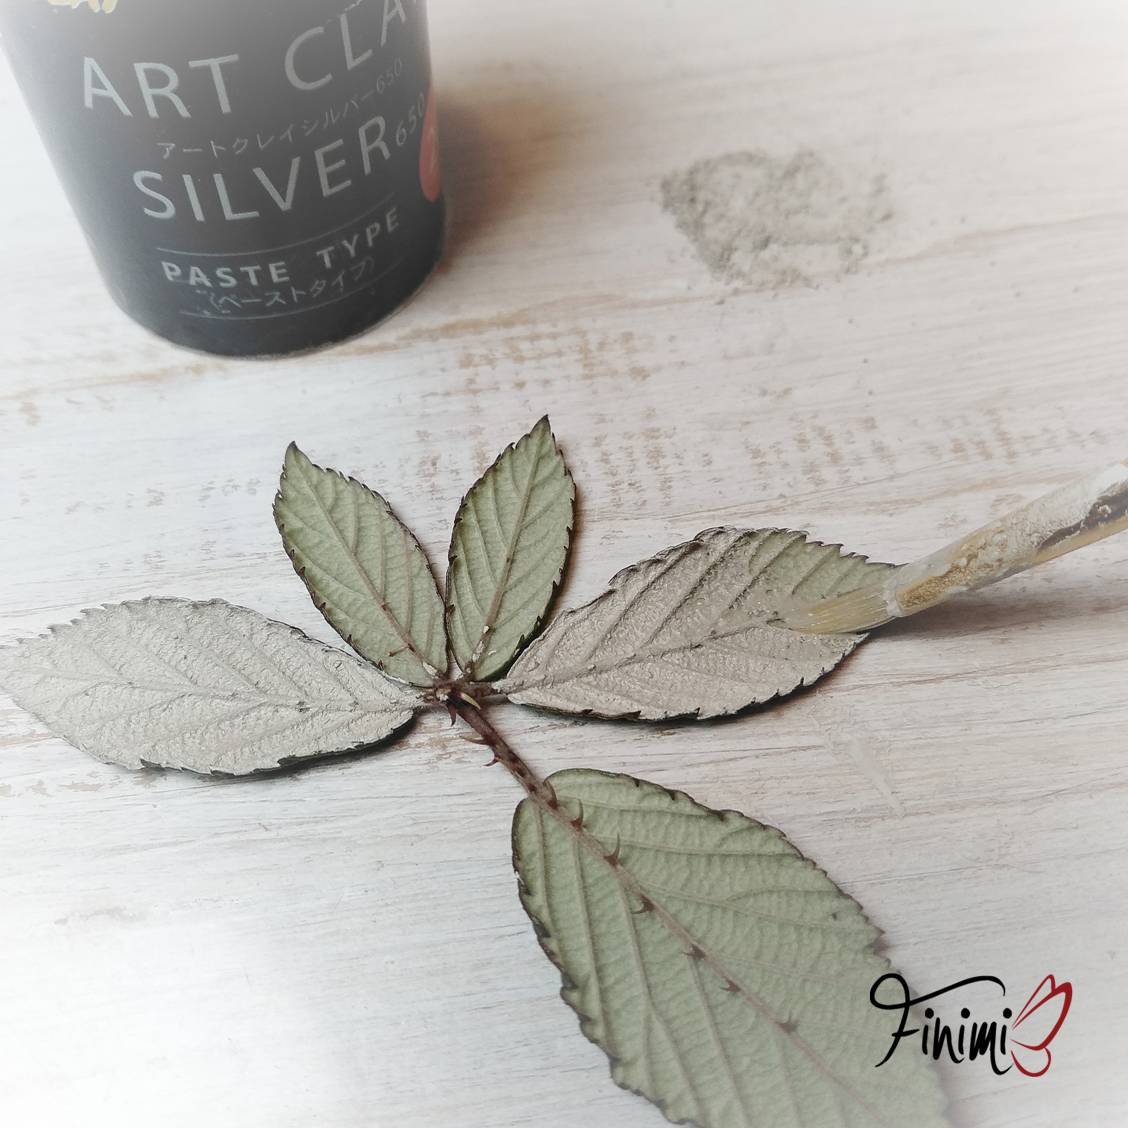
In the first phase, you only need a leaf, a brush and ACS paste. If you bought the original paste as shown on the picture, check its consistency. It is possible that it is too dense; then it needs to be mixed with water to the consistency of a thinner tempera colour. Add water drop by drop. I use distilled water when working with silver clay.
If you have decided to use ACS clay, or you have bought a package of supplies for this project, where the clay is part of it, put it in a small, well-closing, not very high container. Add a few drops of water and mix the clay to a consistency of thinner tempera paint. Again, it is important to add water dropwise, it will not need much.
If you want to utilise lump clay remaining from previous projects, put it in a container and, as in the previous case, add water dropwise until a thicker slurry is formed.
When you have the appropriate paste consistency, start applying it to the reverse side of the leaf. The first layers should be very thin; the paste should be of cream consistency, to get into each recess on the leaf. Don't dilute all the paste! Take a small amount (for one leaf and one layer), for example, into the lid of the container and add water. Apply the "cream" thin paste on the leaf. Allow to dry thoroughly. It is not recommended to accelerate drying with this technique.
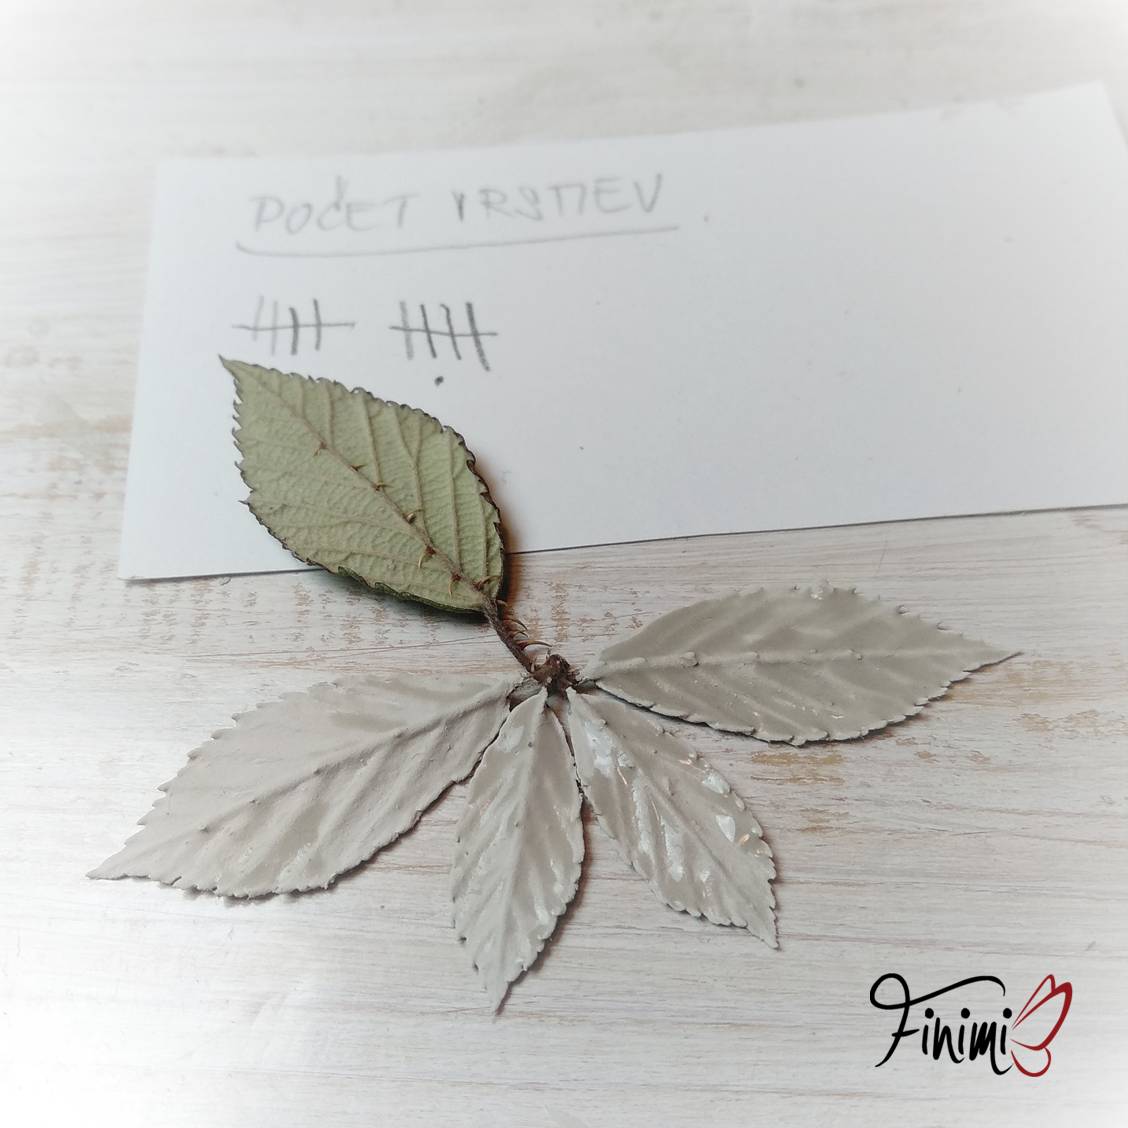
You will apply about 25-30 layers of paste in total. It is important that each layer dries well. The paste will absorb moisture from the leaf, so it is possible that the leaf will shape spontaneously in the first half of the work similarly to natural drying.
Mark each layer on a piece of paper. It's good to have an overview of how many there were.
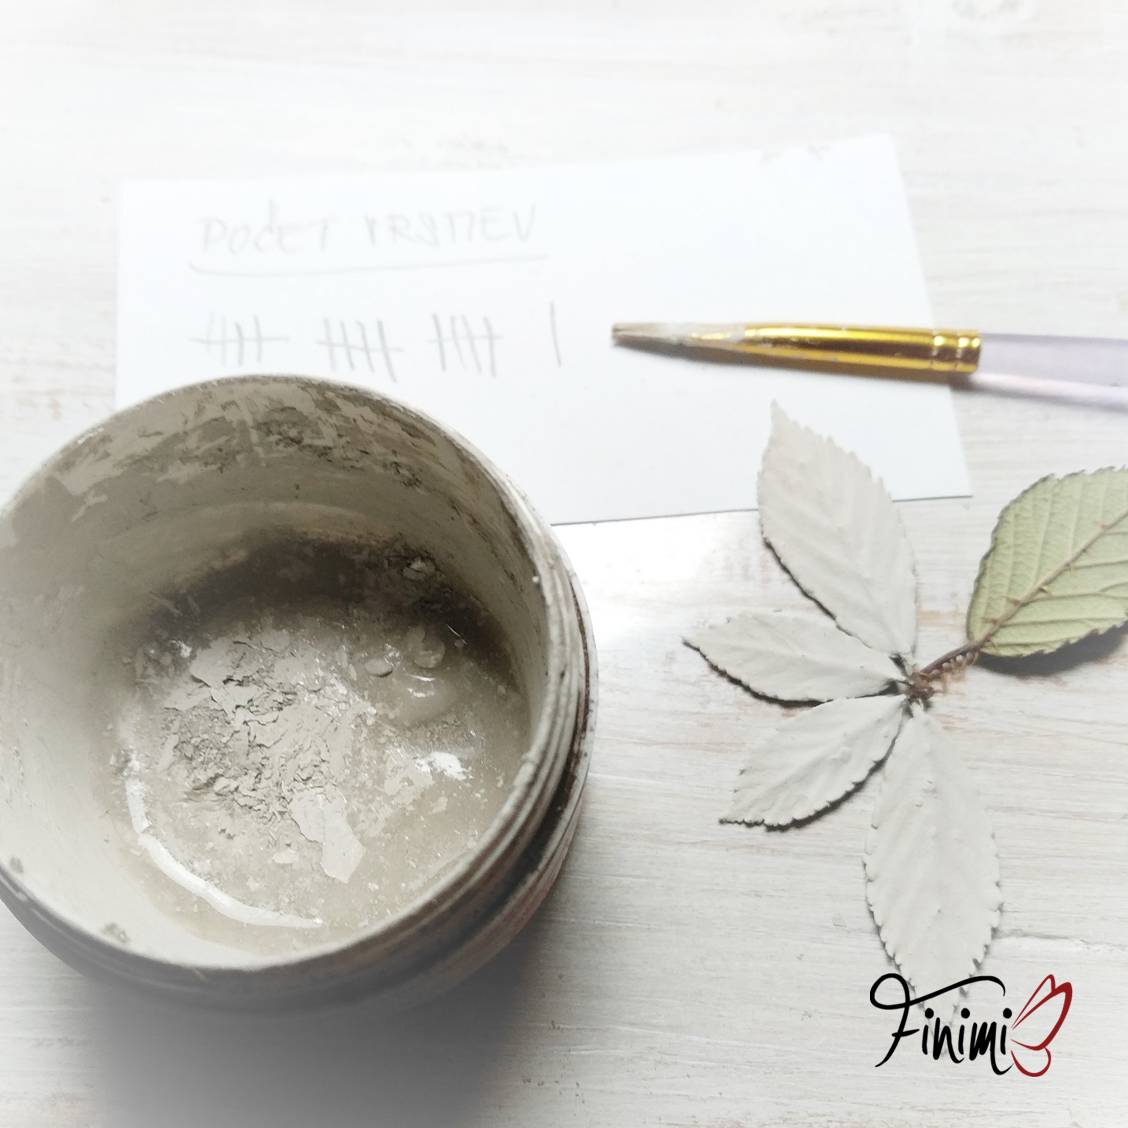

Keep the work surface clean so that you do not get the paste on the opposite side, i.e. on the real leaf that you are painting. Scrape the dried clay from your work surface into your paste container. There is actually no waste when working with silver clay. The material before firing is always usable.
After about the tenth layer, you can start painting a thicker paste with a density of thinner tempera paint.
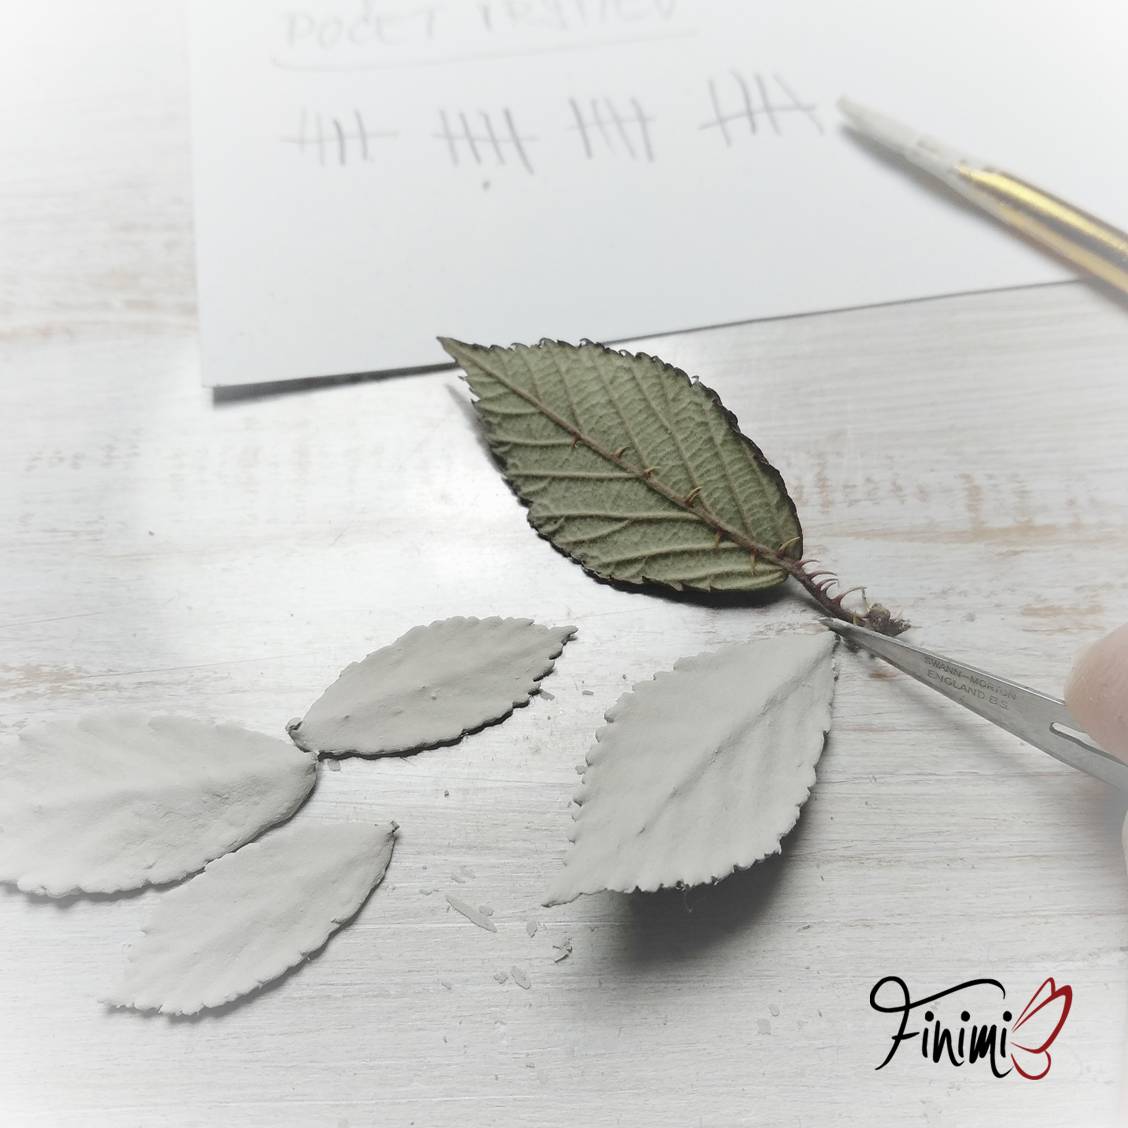
If you've worked like me on several leaves, it's time to separate them around the twentieth layer.
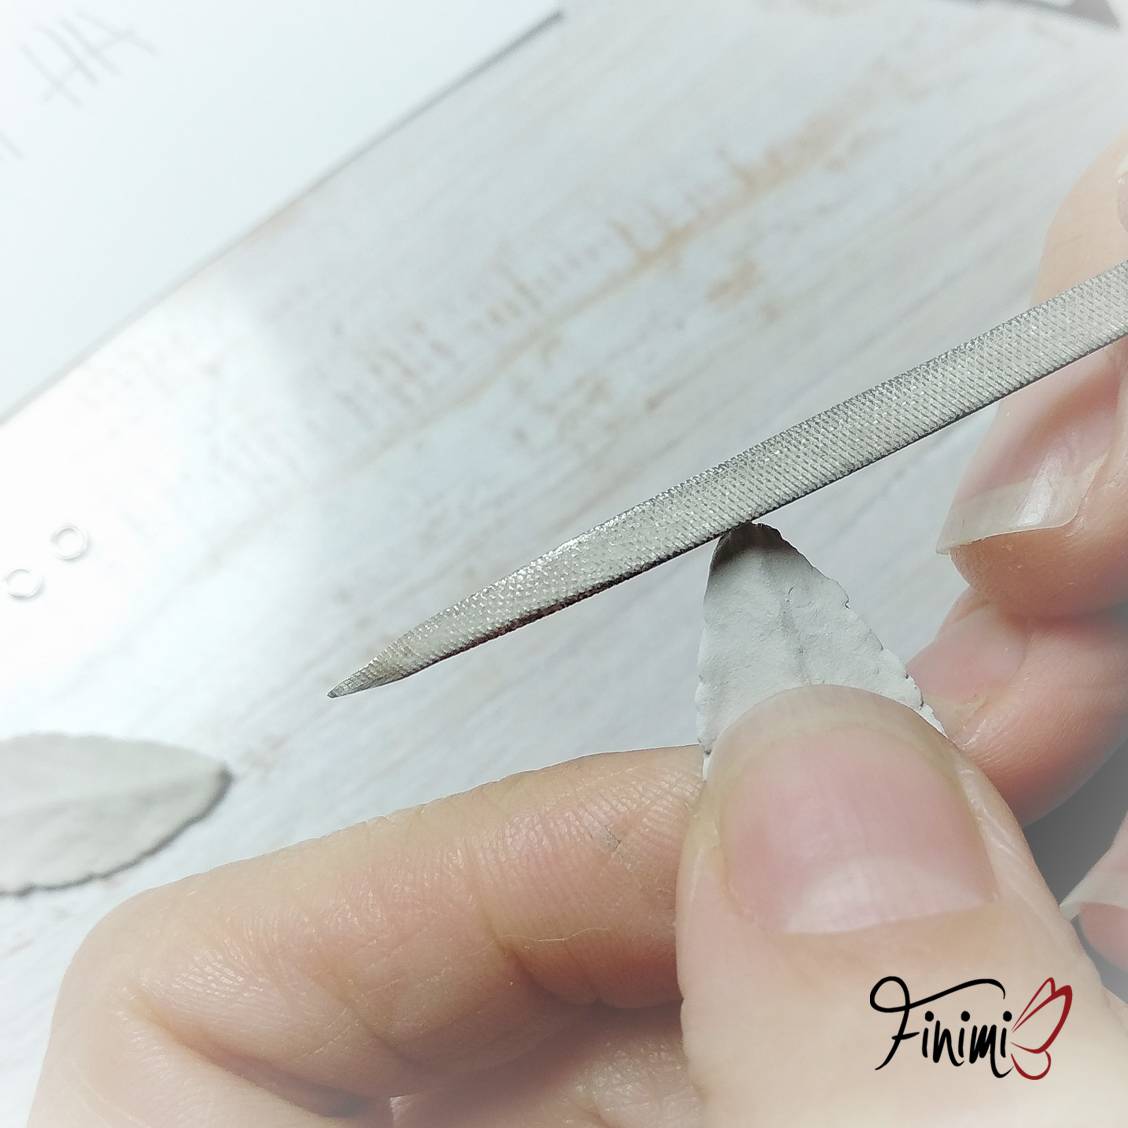

Clean the top point of the leaf where the earring hook will be attached with a fine file. During this step, sand off the work surface do not collect the clay dust. The abraded dust contains leaf residues that would contaminate your paste.
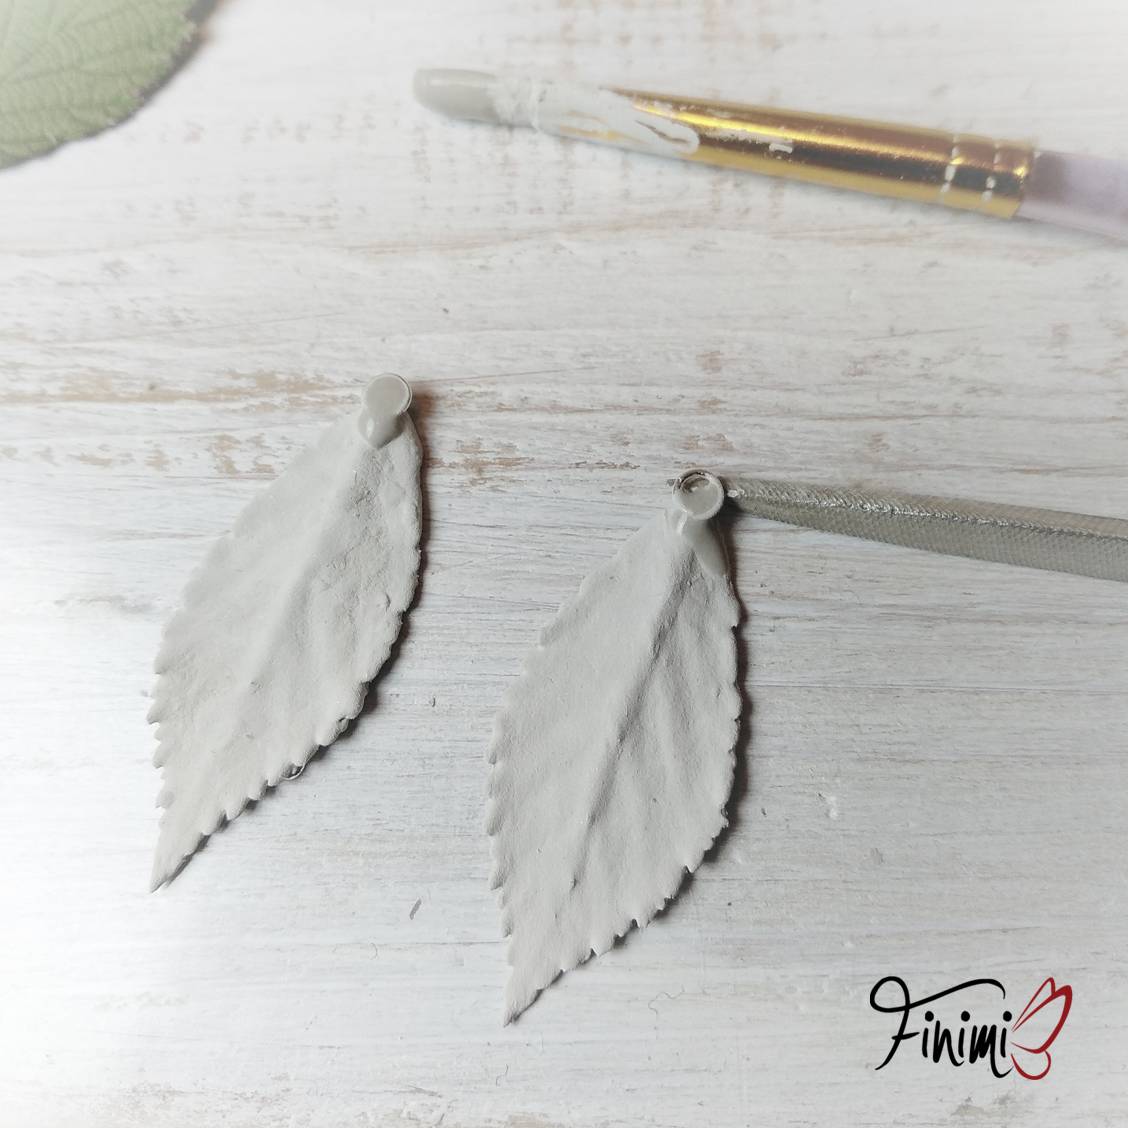
Add a drop of thick paste to the edges of the leaves and attach silver jump rings. Support them with suitable objects if needed so that they do not dodge. Allow to dry well. If the jump rings get dirty, don't worry, this will be solved when the rings are sufficiently fastened and the paste is dry.
Continue painting to a thickness of about 1 mm. At this stage, the jump rings should already be "embedded" in the material. At this thickness, the veins of the leaf should no longer be visible. Warning! Even the thickest veins of the leaf must be covered with a sufficient layer of paste so that the jewellery does not crack in the given spot.

Now you need to prepare the painted leaves for firing. All spots and edges of them must be checked. You can smooth the painted side of the leaves with fine sandpaper; smooth the area around the jump rings with a sharp pointed file. Check the side with the real leaf. If there are paste covered spots, grind them gently or remove them with the tip of a file.
You must be sure that the material has dried thoroughly. If this is your first experience with silver clay, I recommend you to let it air dry for another 24 hours before firing.
Prepare a safe firing environment. I use a shallow metal bowl (no longer needed in the kitchen) filled with small gravel. I place a firing plate on the gravel. When firing, it is advisable to protect your eyes with safety glasses.
Test the torch in advance. Learn how to operate it according to the manufacturer's instructions. Observe the safety rules that each manufacturer states in the product guide.
Art Clay Silver - the silver clay we use needs to be fired at a temperature of min. 650 ° C. Since the burner does not have a thermostat, it is necessary to carefully watch the fired piece so that it does not melt or deform.
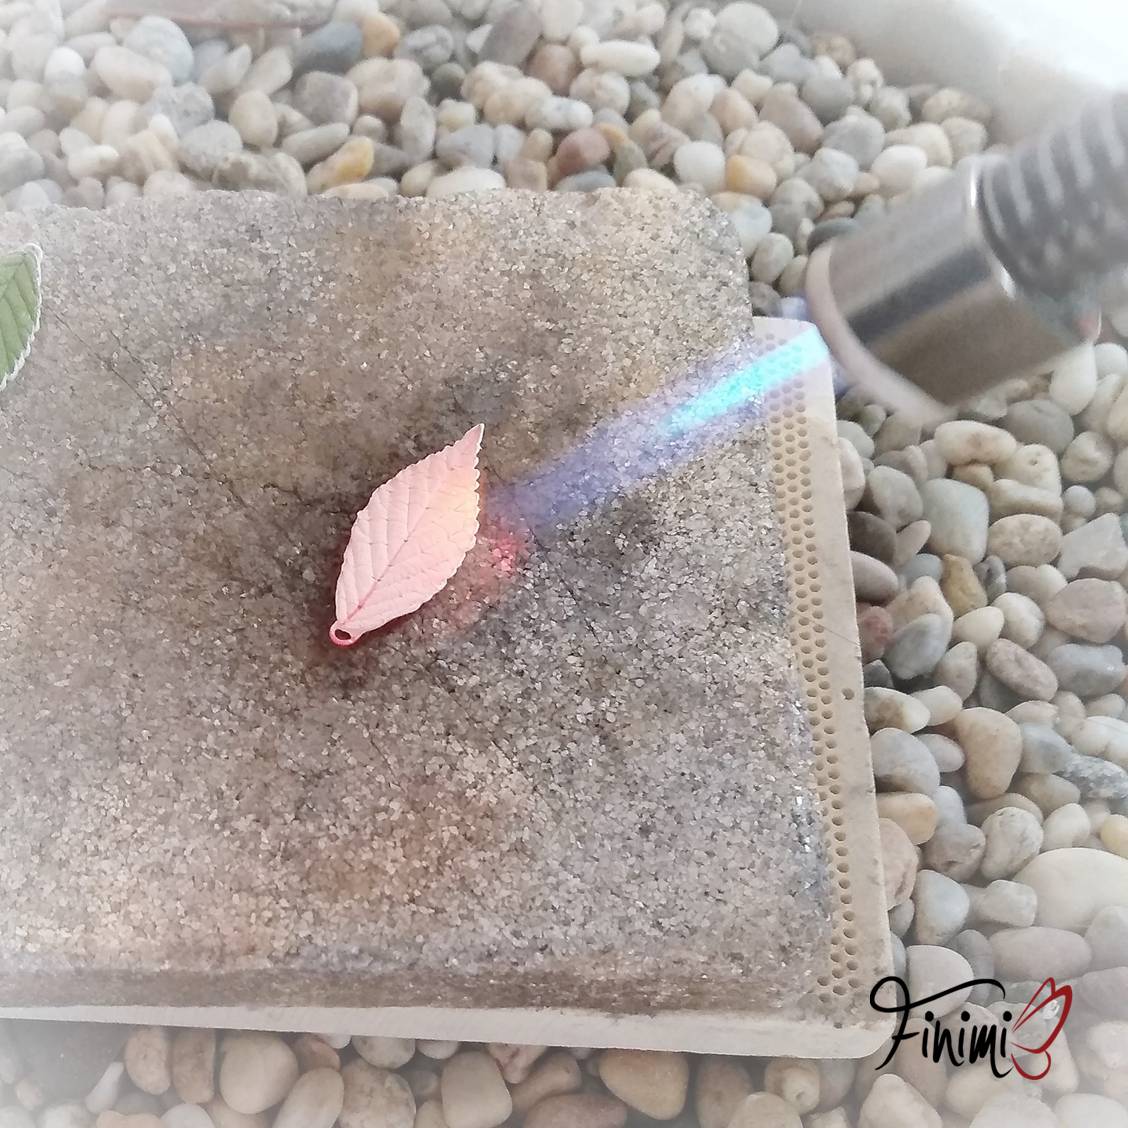
You need to fire one leaf after the other. I do not recommend firing both leaves together. Place the leaf on the firing plate and ignite the flame. Start "stroking" the leaf with the flame and heat it evenly the entire surface. After a while, the leaf turns black and starts to burn. You will see a bright little flame that will burn for a while, even if you move the torch flame away. At this moment, not only the dry leaf but also the binder in the silver clay burn out. The clay turns a little black, but clears up in a moment.
Keep "stroking" the leaf patiently until it reaches a soft salmon colour as shown above on the picture. You must now maintain this colour for 3 about minutes. You can affect the colour by bringing the torch flame closer or further away from the object being fired. If you get too close, the colour will darken and gradually change to bright orange. This is a signal that the silver is getting close to the melting point. And you don't want that! In this case, bring the flame further away from the piece immediately. Don't worry about going wrong by firing for too long. You can fire for a very long time at the temperature of the salmon colour. This will not harm the piece. Only the bright orange colour can destroy it.
Have you reached 3 minutes? You can turn off the torch, but be careful; the leaf is still very hot.
If you would rather have your jewellery fired in a professional jewellery kiln, you can use our firing service.
Carefully grasp the leaf with metal tweezers and dip it in a bowl of water. Don't be afraid of hissing of the object in the water. It's a sign that it is fired well. After a while, you can remove it and dry it.
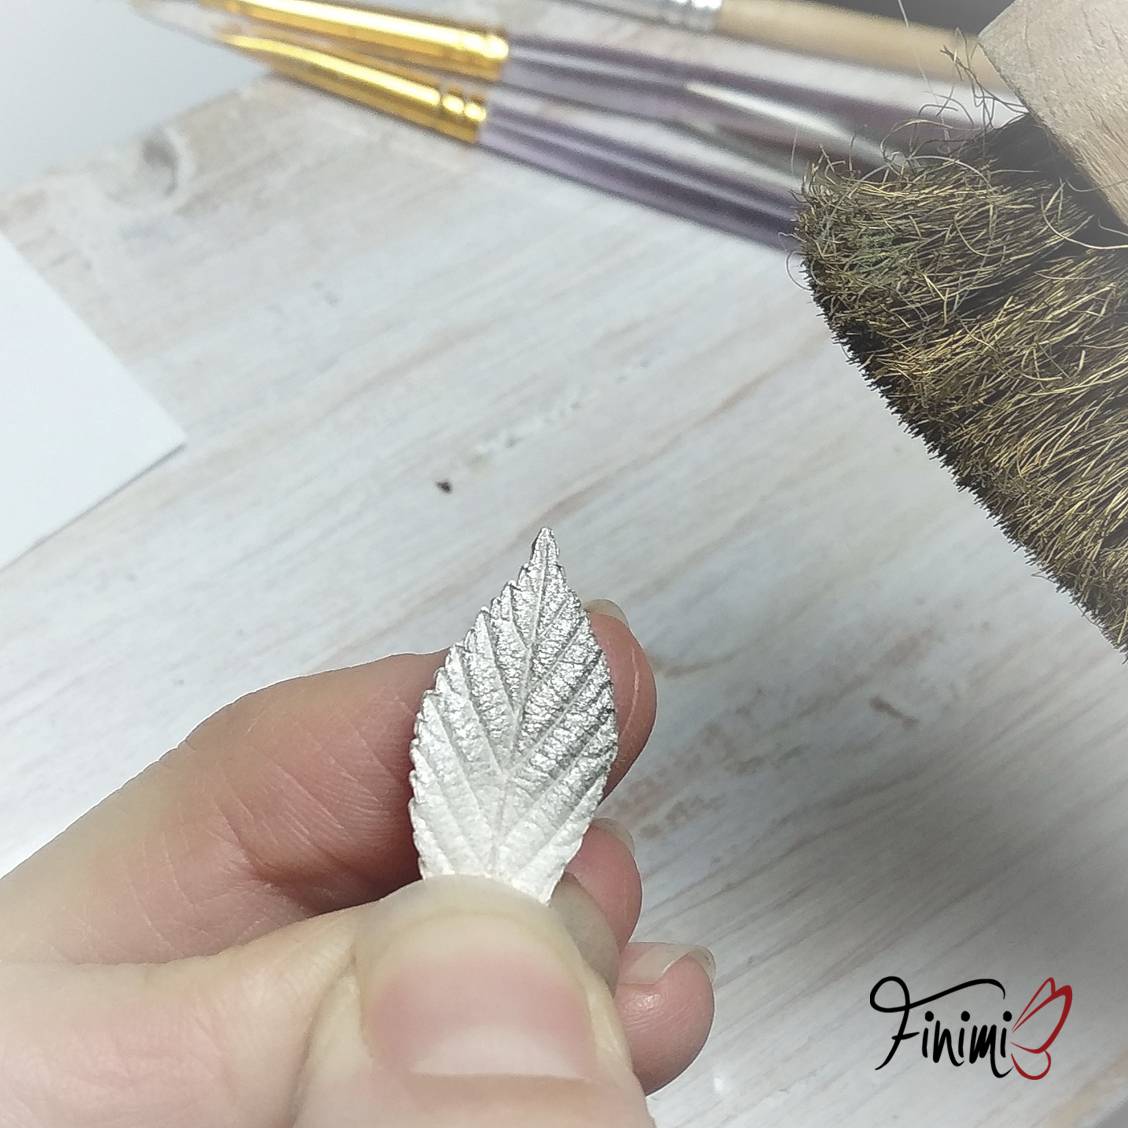
The fired piece is white and does not look like silver, but believe it or not, you are holding a piece of fine silver in your hand. It has perfectly taken on the form of the leaf on which it was applied.
Now you will need a fine brass brush to remove the white layer of the leaf. It is best to do this under running water. Did silver get out? Do you already believe what you have created?
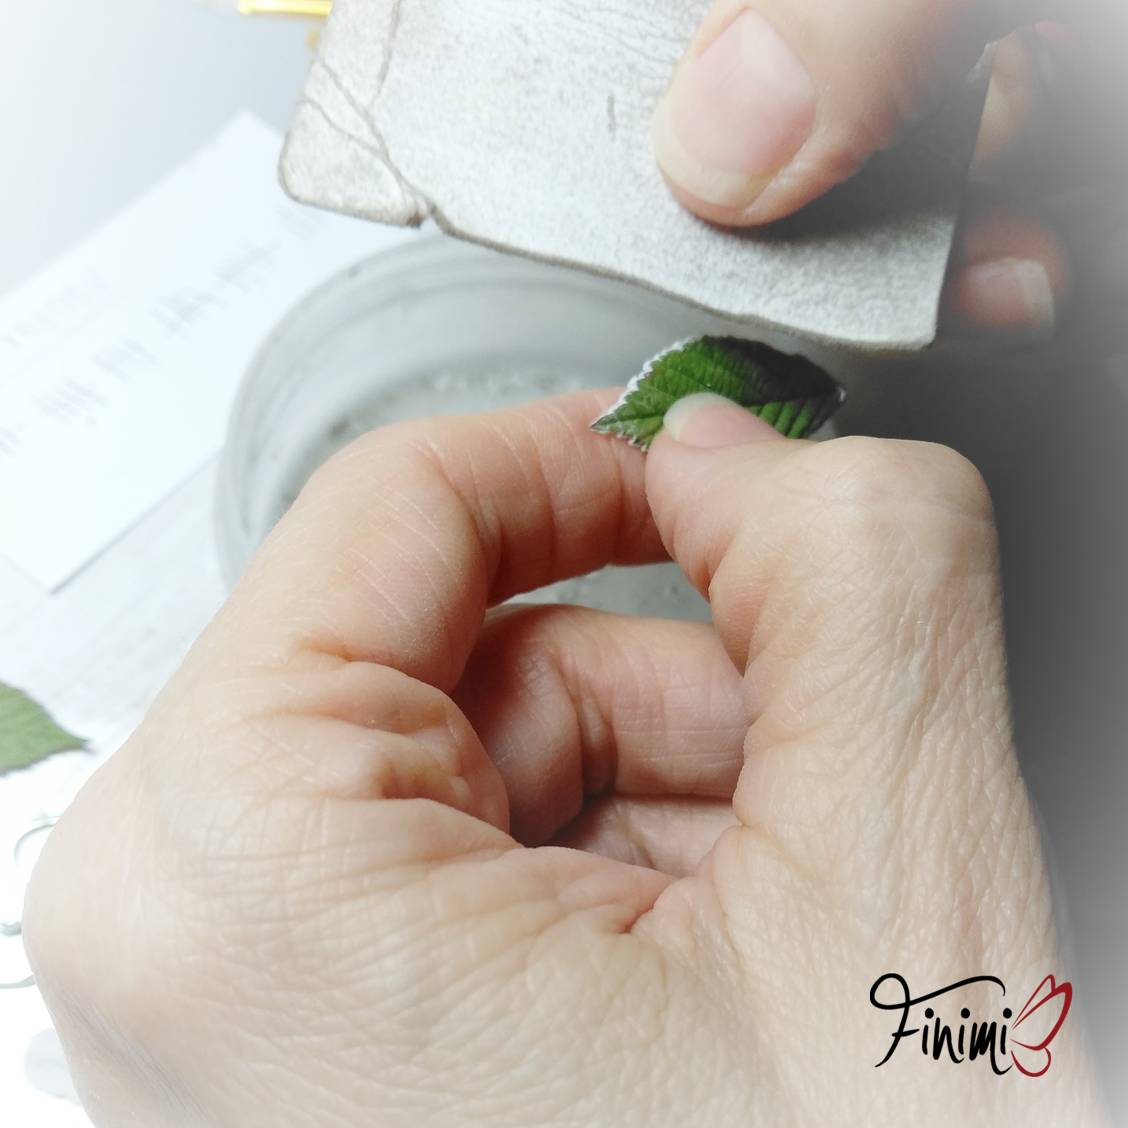
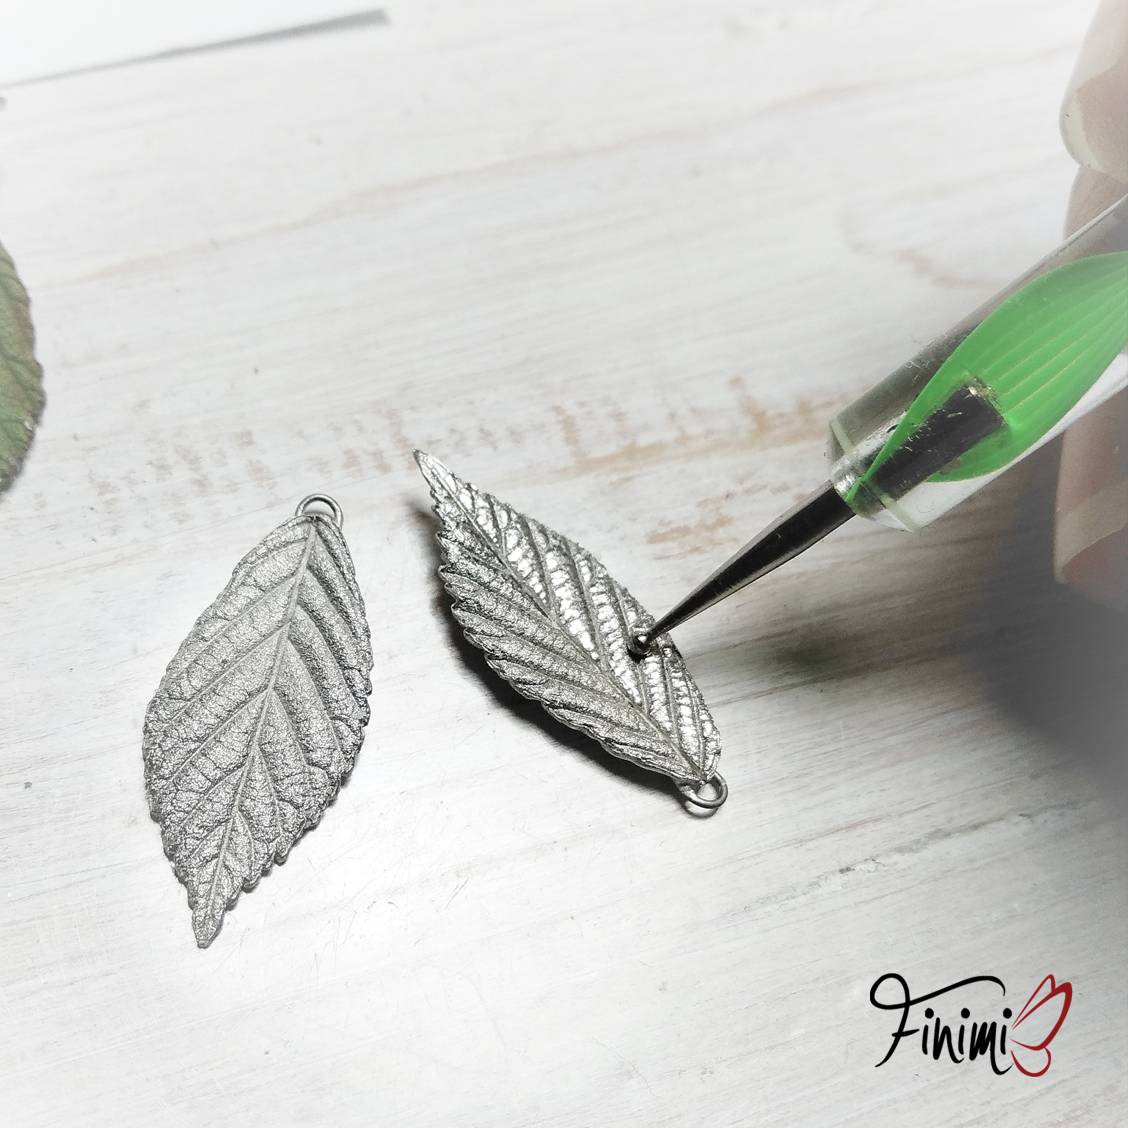
Once the white layer is removed, take your stainless steel tool. Stainless steel polishes silver. Scroll through the entire leaf. In the picture, the right half of the right leaf is polished while its left half is still matte. Your tool will not get into the fine recesses of the leaf, which will remain matte and the contrast enhances the leaf structure. You can also polish the back, but you may decide to leave it satin matte.
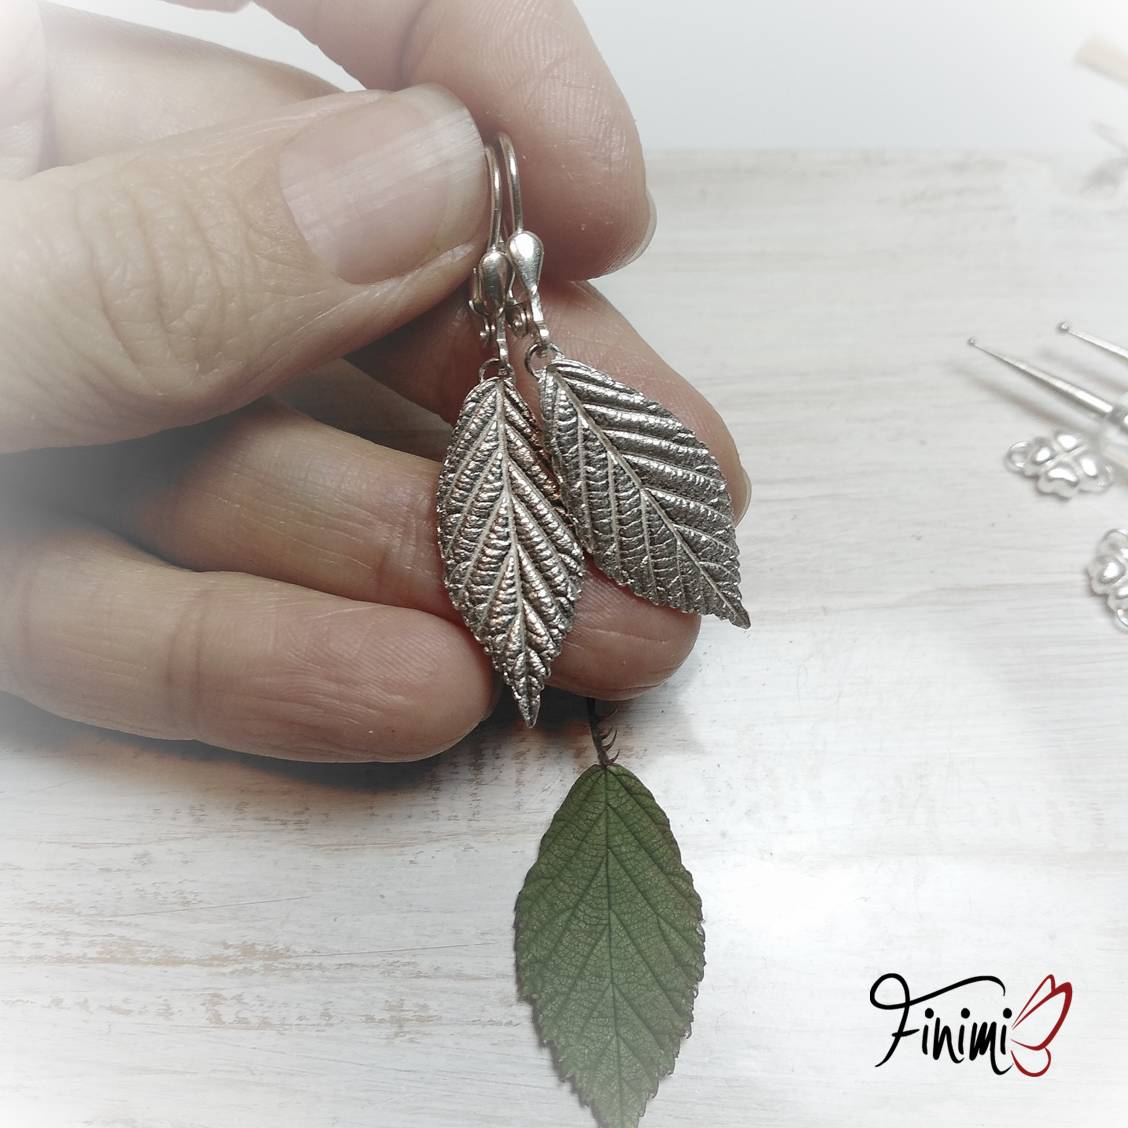
Finally, attach the earring hooks.
Now you only need to wear your jewels proudly.
The Supplies Package can be purchased in our e-shop.
We will soon add all the tools for this project to our e-shop and provide them for you in cooperation with our partner (http://www.extras-shop.sk/) so that you can conveniently buy everything for this project in our one-stop-shop.